The Basement Saga

Alright. So when we moved in, we did have a finished basement. By finished, I mean that there was wall to wall orange carpet. I don’t blame the previous owners- the house was built in the 70’s after all. That was the style!

But 40 years later, that carpet was musty. We didn’t want carpet in the basement for many reasons. So… we pulled it up. We discovered beneath that was wall to wall troweled on adhesive. Thick. No way to paint over it. It had to be ground up no matter what we put down other than new carpet. Since new carpet was out of the question, we began the grinding process.

So, me being naive thought, “well if we are going to be grinding every little bit of adhesive up, we might as well acid stain the floors.” A nice theory indeed. Even though we did TONS of research, it still ended up being much more than I had imagined. So here was the process if you are ever considering a similar process.

So here was our starting point.

We began this project in February of 2016. Late February, my husband and his dad Mike, pulled up all the old carpet. When they were done, it looked like this by early March:


Look at all that adhesive! It’s almost like a layer of carpet it was so thick.

So then we tried scraping up the adhesive by hand. Hahahahaha. That is so laughable.

Then we rented a machine. I’m going to say this many, many times. Put up plastic sheeting and shut doors by areas you do not want concrete dust. Let me repeat that- PUT UP PLASTIC SHEETING! We did not. The consequences were severe!

Ok so off to Home Depot we went. We rented a floor grinder. See that door there? We should have shut it. And put up plastic sheeting!


After the initial floor grinding, it looked quite a bit different! Started to look like actual concrete.


This was mid-march. I was pretty pregnant. I still helped clean up concrete!!! A week later I looked like this!! 10 days after this picture, John Michael arrived!


5857210_hrmbxwnku4d25.JPG


Have I told you how sticky concrete dust is? Trust me. That stuff is worse than drywall dust. And that stuff is so bad too. It is horrible to clean up. Just not going to sugarcoat this one- sorry!

Alright- so then the project took a big break because JM was born. Turns out he needed a bit of our time! 🙂

20160330_050109


Alright. So let’s fast forward a year. Over the past year, (not pictured) we would fuss here and there with grinding. It took a very long time. Joe had to then use a small angle grinder to get up near the walls. In March of 2017, it looked like this.

Look at my handsome concrete man!

Then, not pictured is the thousands (ok it feels like it) of times we had to wash the concrete before staining.

The staining took like two seconds. I should have taken a picture of this too, but forgot. (We used Eagle Concrete Stain from the Home Depot. Here’s the link: http://www.homedepot.com/p/Eagle-1-gal-Rustic-Concrete-Acid-Stain-EDADR/203012900  We also used the other Eagle products to prepare the concrete before we stained and also Eagle sealer and wax when we finished the project. I will say we did really like the product itself).

So then once the stain was on, we had to wash it again another thousand times. (But seriously, probably a hundred). We had to wash it until the water was clear. The struggle was real.

20170604_135913

A few videos of this arduous process!


As you can see in the above videos- it took a very long time for that water to come close to clean. We used a variety of methods. Mopping, shop vacuuming, etc. Many many cleanings.

Then once it was clean, we sealed and waxed it. When this was finished, it looked like this!


Remi did not enjoy being separated. 😦

Then I painted all the walls a fresh white. JM helped me go buy the paint!

20170607_155550


Remember all that concrete dust I was talking about? I had to wash every single belonging free of concrete dust. Pro tip- block those sections off if you can. If not, vinegar and dish soap with warm water works well! I wiped it with that solution and dried with fresh paper towels.

I used J’s old sign for motivation!

20170629_182529

Then I painted the work area- benches are a high gloss white. Walls white. The floor is porch and floor paint in a custom gray.


Finally, we hooked up the tv. Then put our furniture and belongings back. Lots of cleaning and organizing. But the end result is fantastic. We love it!


Remi likes it, we can tell!

So the things we still have to do: touch up the area where the carpet trim used to meet the bare floor by the wood stove, touch up the bar a bit- there is a still a bit of carpet on the bottom, and switch out all the tan plugs for white ones. And I’m pretty sure we’ll have some little things and cleaning to do. Perhaps will update the ceiling in the future.


For now, we are done! And now we are about to eat some pork tacos in our new space!


Restaurant Salsa/Sauce

J and I frequent Chipotle every now and then. They have the best salsa for putting on burritos and such. Since I can’t just waltz in there and buy a big ‘ol tub of that stuff, I had to create my own version.

Seemed like people were putting tomatillos in their salsa, so I copied that idea. My mom went out west this summer and brought me back a pepper wreath. So we plucked a few off that to make this salsa too. So here’s what ya do to make this tasty sauce/salsa. We dip chips in it and also put it in tacos and burritos.

First you need 4 or 5 tomatillos. You pull the husks off them and the hard stem. Throw them whole into a sauce pan with 2 cups of water. Then you get some chiles. I clipped a few off the wreath mom gave me and also supplemented with these mexican chiles from the grocery store. Maybe 6 of these small little chiles or so. I just kinda guess. You don’t put the stem in, but you do want the seeds. So what I do is use kitchen scissors and clip them into tiny slices over the pan. The strips and seeds will fall in.

Next, you will bring the tomatillos and peppers to a boil and then simmer for about 7-8 minutes until the tomatillos are quite tender and change color a bit.

While the tomatillos/peppers are simmering, into a food processor you put in 2 tablespoons of lime juice, however much garlic you want (I put a half a head into mine- but that’s all preference), 1 tablespoon of siracha or your hot sauce of choice, and about 1/4 tsp of cumin.

When the tomatillos are done, take a slotted spoon and pull out the tomatillos and peppers. They will go into the food processor as well. Reserve your cooking liquid just in case you want to add a little water to thin out your salsa later. Personally, I never do. I like the consistency without it.

Blend up all the ingredients and then add salt to taste. Pour the salsa into a bowl or container and chill for at least an hour. You can make it ahead of time. We’ve also put it in the freezer to use later and both ways are wonderful.

Here’s what it turns out like in the end. It makes a great sauce on things or just with chips for dipping. 🙂

20170706_185853

The Kitchen

Ok so I promised I’d tell you the story of our kitchen renovation.

Our previous home owners had put in beautiful cabinets. Hardwood, sturdy, made of ash. The only problem? They were just a bit too traditional for my taste. As someone who enjoys cooking, the upper cabinets just frankly restricted our space quite a bit. We enjoy entertaining on occasion, so our sight lines were also a little blocked off.

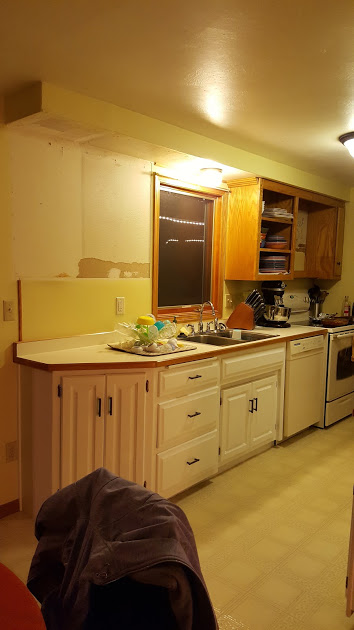
Here’s what the kitchen looked like when we moved in.


In these pictures, we hadn’t done anything yet. The hardware was brassy. Again, the kitchen was definitely nice, just not quite our taste.

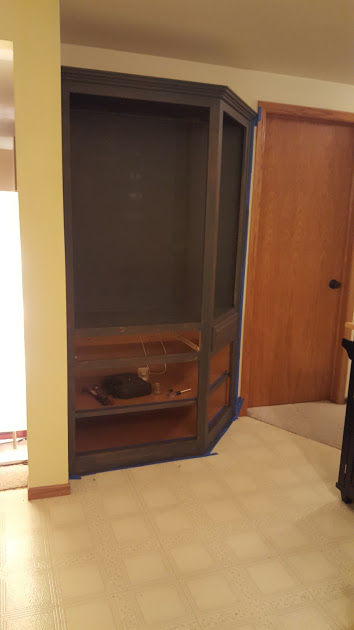
So, then our next step was to paint and change out the brass hardware to more of a deep bronze. In some of these pictures the paint color was not on yet, but eventually it was a light greenish/yellow. I picked this color to be a little bit more cheerful. We took the doors off the china hutch- that really updated the look right away.


Then the kitchen stayed this way for the next couple years until this winter. We were already in the middle of a big basement project. I knew I wanted to update the kitchen in a more major way down the line, but it will be awhile before we can fully afford that. (Kids!) That’s ok. But I definitely needed to problem solve. Late one night (remember, I did have an infant son!) I found myself standing in front of the stove. What if I just moved things around? Paint? Take down some cabinets? I know it’s cliche- but let me tell you, paint and reorganizing a space are probably the hugest and least expensive changes to a space.

So anyway back to the story. There I stood in the kitchen. “Joe??” I think my husband secretly cringes every time I call his name in that questioning manner. He knows my wheels are turning. “What if we just change the layout and change some cabinets?”

Joe is careful- I say this with affection because he is definitely less impulsive than me. 🙂 I think he said something around the lines of maybe we should finish the basement project first. And maybe a, “I’m not sure if you want to do that at this juncture.” Well, you guessed it. I talked him into it. I assured him I would do the painting and we could do both projects. Thanks Joe 🙂

The first step was picking out paint. I did a lot of research- a LOT. Repainting cabinets is a huge job. I wanted it to be high quality but I did want to skip the sanding if I could. I don’t mind a brush stroke here or there. I LOVE the paint I picked. I found it through the blog of another person who embarked on a similar project. To give her credit- here’s the link to the blog I found! We used General Finishes Milk Paint- Queenstown Gray and Snow White.

https://www.designertrapped.com/how-to-paint-kitchen-cabinets/

Once the paint came, I tested it out. It is pretty amazing stuff. The white took more coats, but in the end, fantastic.

20170209_102814

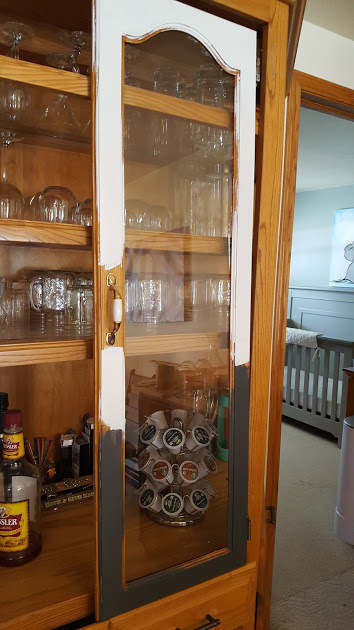
The first thing I tackled was the coffee bar. I painted this in gray. Took a long time but worth it! With a plug in the back, we can now house all our glassware, bar and coffee materials here. So happy with the result.

20170216_215027


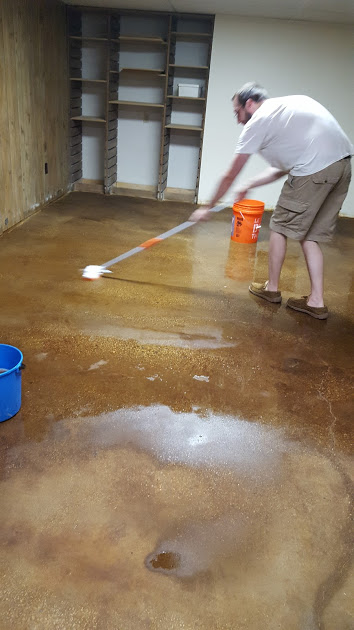
So one winter evening, February 16th to be exact, my father-in-law Mike came over and we began taking down upper cabinets. Pretty sure everyone thought I was crazy. But they supported me!

20170216_190232

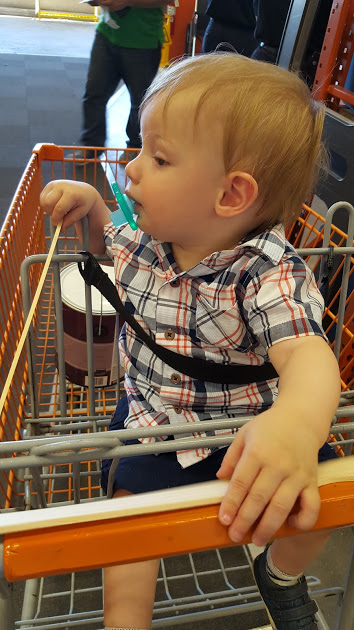
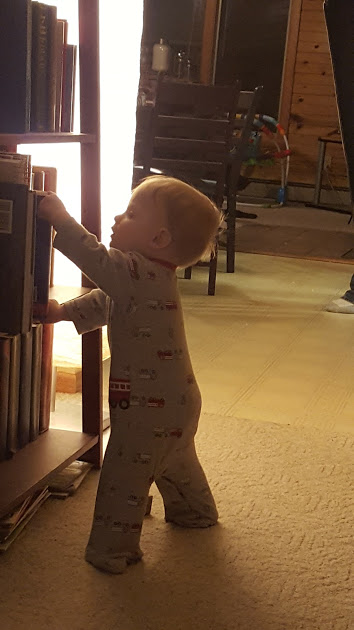
As a reminder, here was our little 11 month old who liked to help!

20170217_185907

Then I began painting the lower cabinets. This was quite time intensive but so cool in the end. We also shifted the cabinets over.


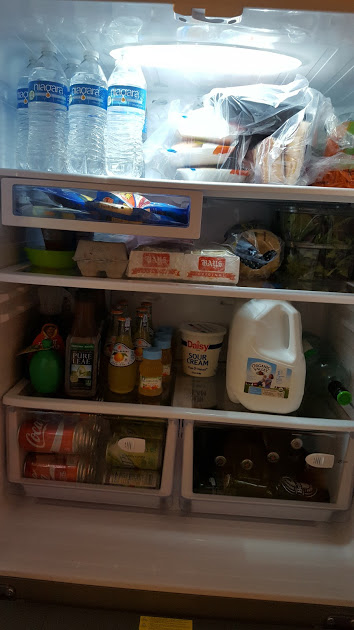
Next we had a new fridge delivered! A counter-depth one. We absolutely love it. Eventually it moved to the other side of the kitchen but was placed here temporarily.

The fridge is amazing.

20170521_133111


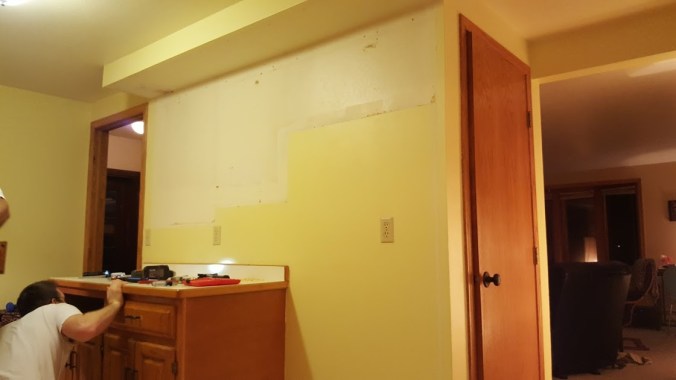
Then it was time to begin taking down cabinets on the other wall as well as paint the lowers.

20170228_210750


I wasn’t too happy with my cheerful” yellowish/green wall color. So, I painted all the walls in toasty gray. It has hints of green in it but is mostly a light gray. Neutral and bright at the same time.

Next step was to paint the kitchen table and chairs as well as the small little island the same Queenstown Gray as we painted the coffee/wine bar.


Within this time frame, my new Chip and Joanna sign came! And our new garbage/recycling set-up. They even sent us a fun note 🙂


20170409_114152

Mike then helped Joe take down the last set of upper cabinets. I also painted the dishwasher with liquid stainless steel. I knew we couldn’t get a new dishwasher at the moment and it made quite an improvement on the ivory one we had.

Then at John Michael’s first birthday party, we installed the hood- it does vent out through the roof. We swapped the stove and refrigerator. Then we put in a lot of recessed lighting. This made cooking so fun!

This slideshow requires JavaScript.

Before my parents left in March, we put in the open shelving.

This slideshow requires JavaScript.

Mike and LuEllen gave us a new light to put over the kitchen table in May!

Then my dad set about installing a gas line for our new (to us) gas stove!

And our most recent upgrade was a new overhead light and some track lighting over the sink from my family friend Geoff.


So we started mid-February and finished early July! 4 1/2 months while we completed the basement and other small things- not to mention we have full time jobs, a dog and a kid!

Joe and I worked hard on this project, as did both sets of our parents- who we can’t thank enough! We love it.

So here it is- start to finish!!


So what do you think??

John Michael

My little buzz. He is just getting so big. Now he is a big shot climbing into the chairs and couches himself. Really have to watch this little guy pretty closely these days. I got lots of special time with him as I was off of teaching summer lessons for a couple days. Love it :).

20170705_084854